|


| |
How to create a new SQL Azure Server
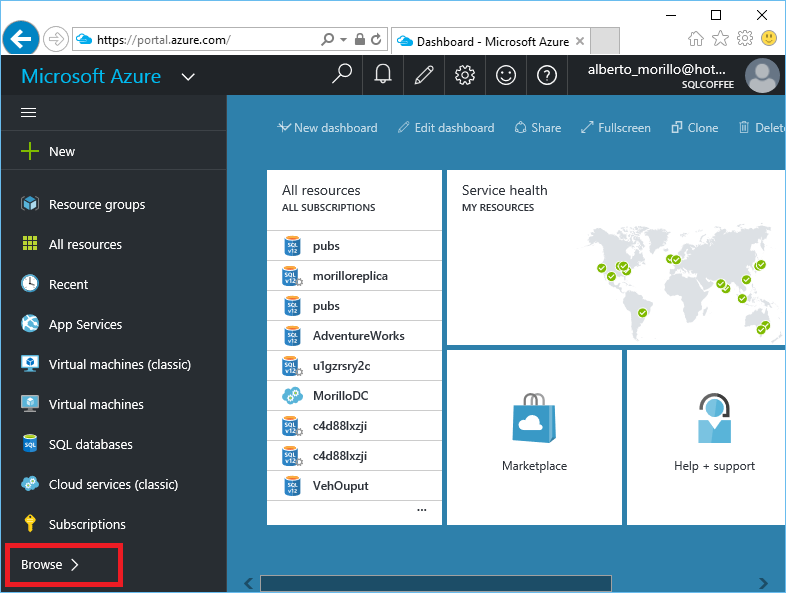
To create a SQL Azure server log in the Azure Portal here and then click on
Browse as shown on below.
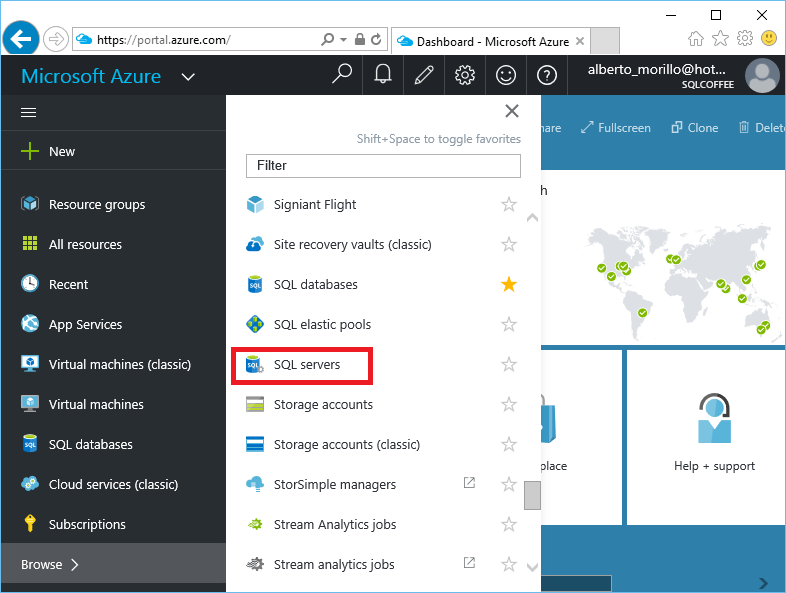
Select the "SQL Servers" option as shown below.
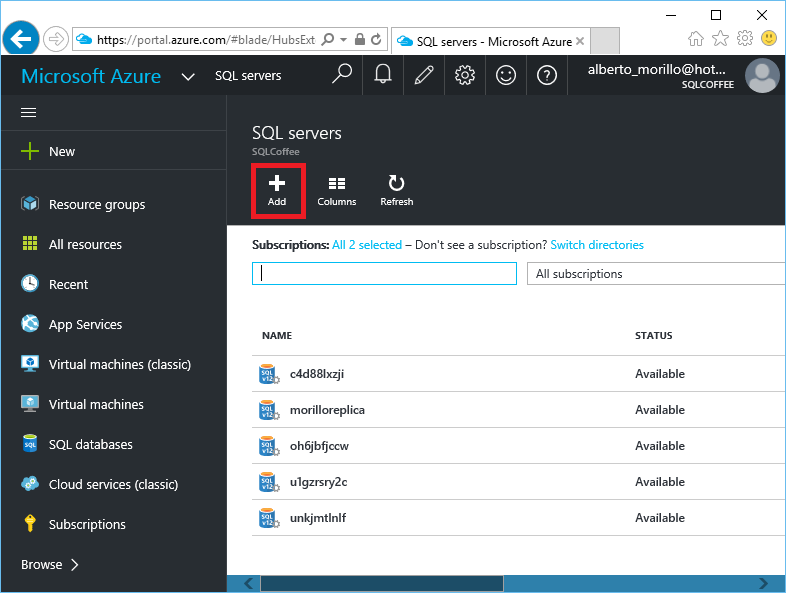
Click on "(+) Add" to create a new server.
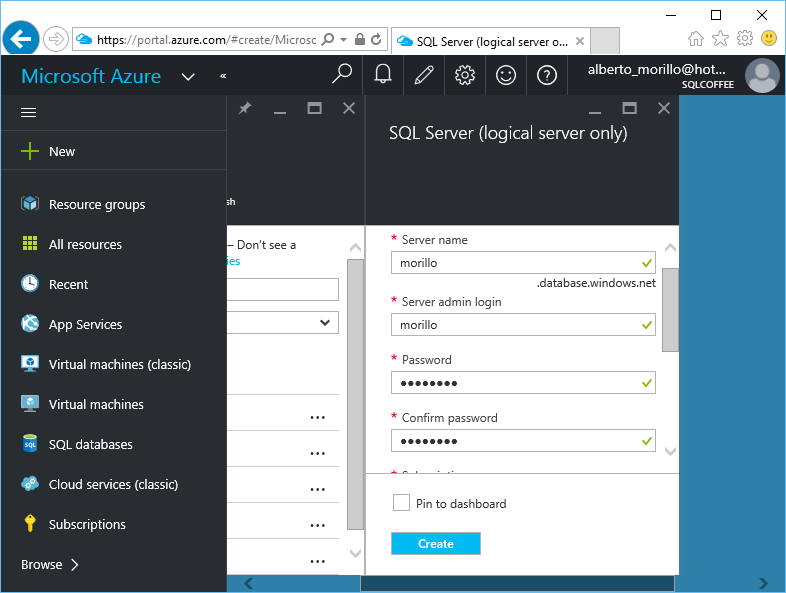
Provide the Server Name, Server Admin Login, the password for that login, then
scroll down on that panel.
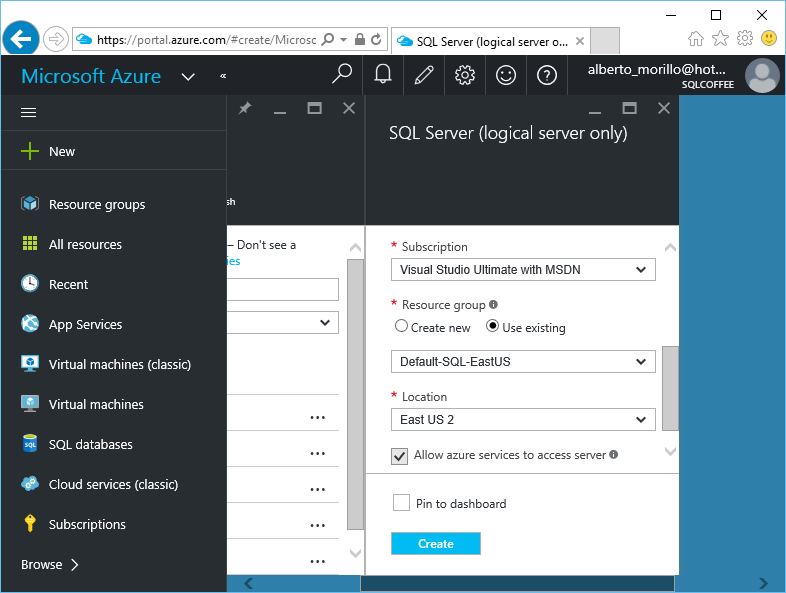
Complete the fields required. Provide the subscription, create or use an
existent resource group.
If you check the checkbox named "Allow azure services to access server" it means
that anything within Azure can attempt to login to this SQL Azure server and its
databases.
Once you fill all the required fields you can click on the "Create" button.
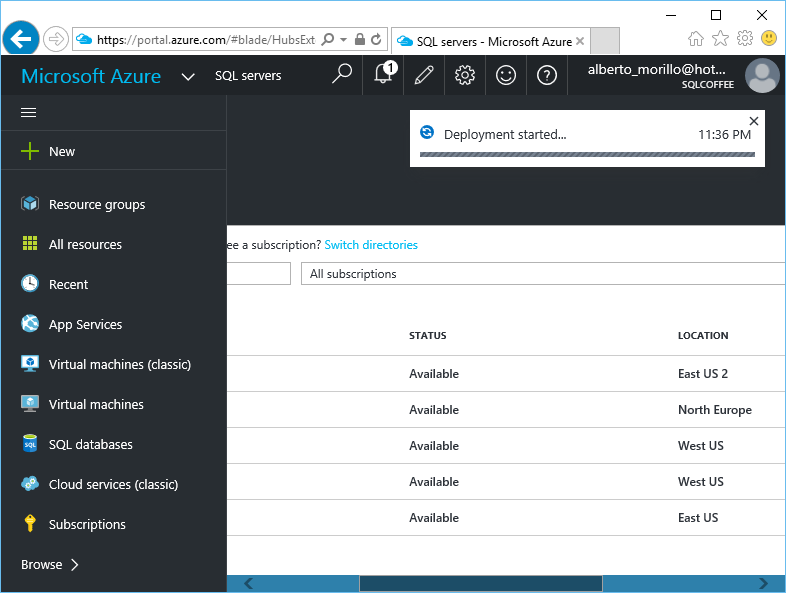
Once Azure has finished to create the SQL Azure server, click on Refresh to see
the server listed as one of your database servers.
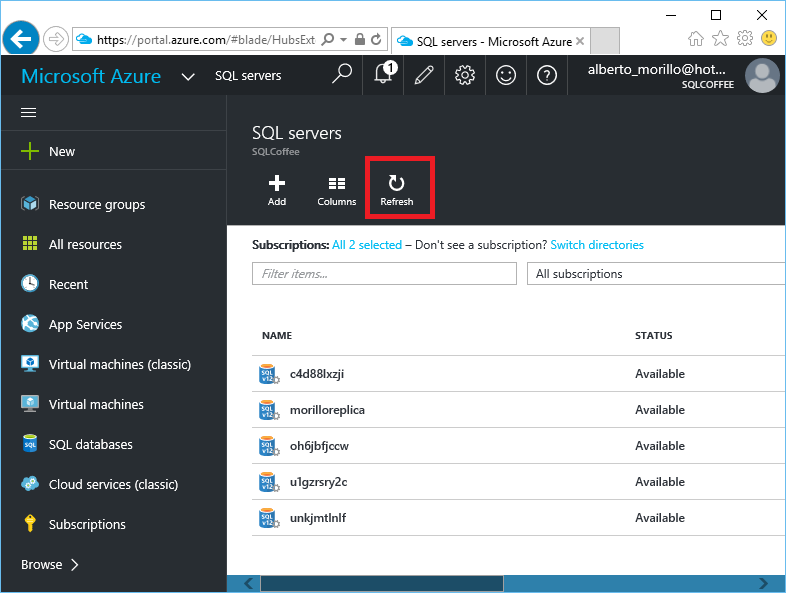
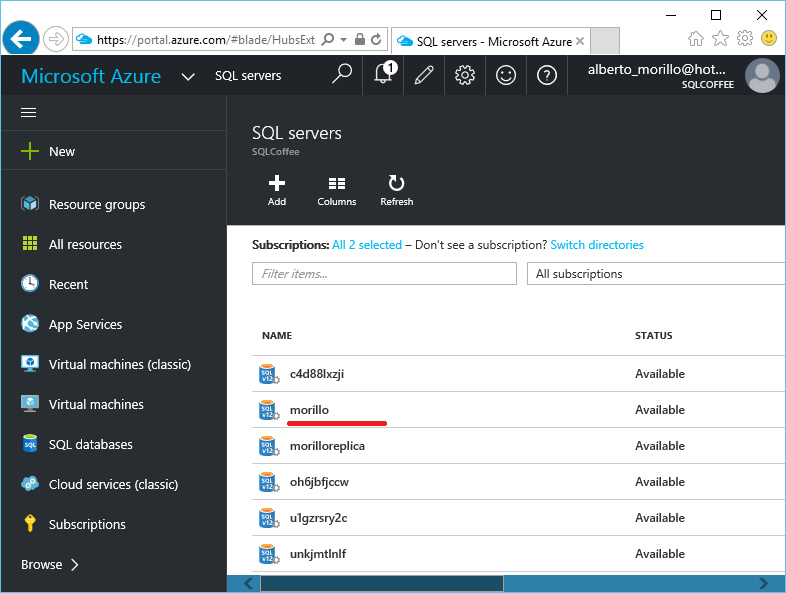
As you can see below, the SQL Azure server has been created.
Now make a click on the name of the server.
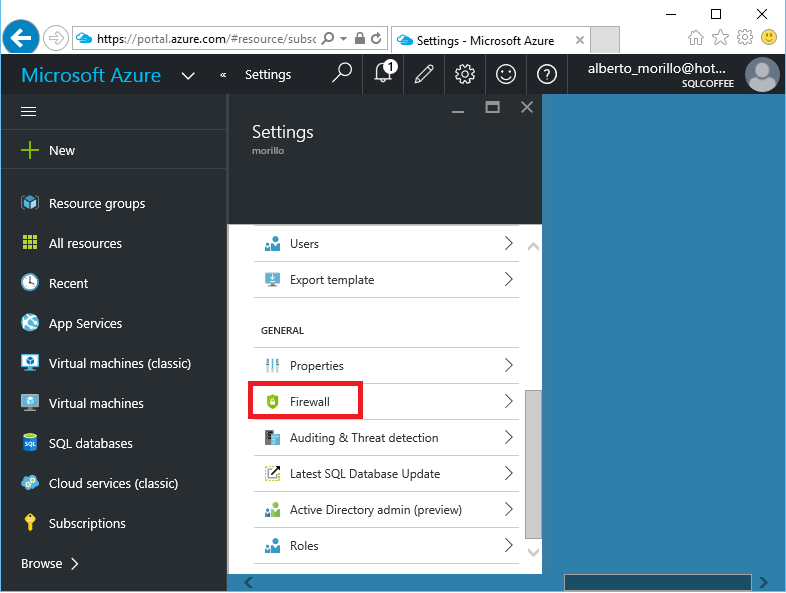
Let's configure the firewall to allow access and accept requests from an
specific IP address.
Make a cick on the Firewall icon shown on below image.
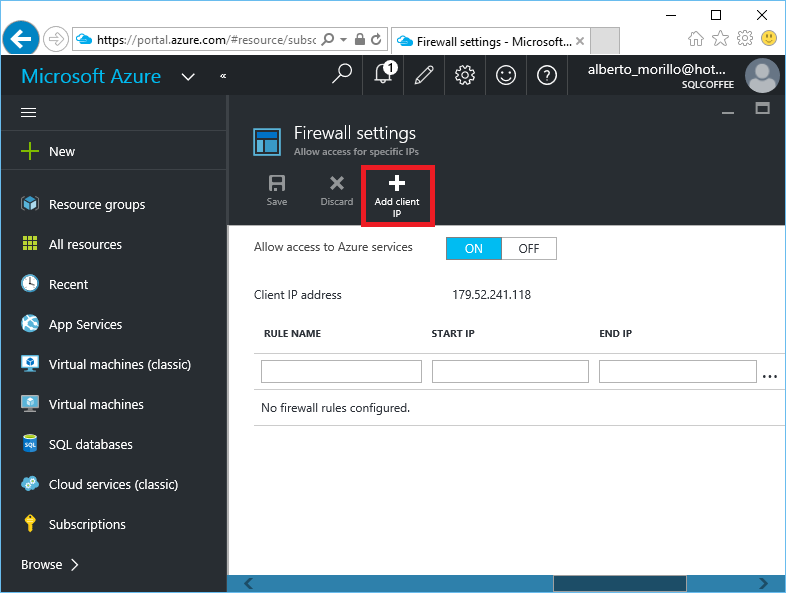
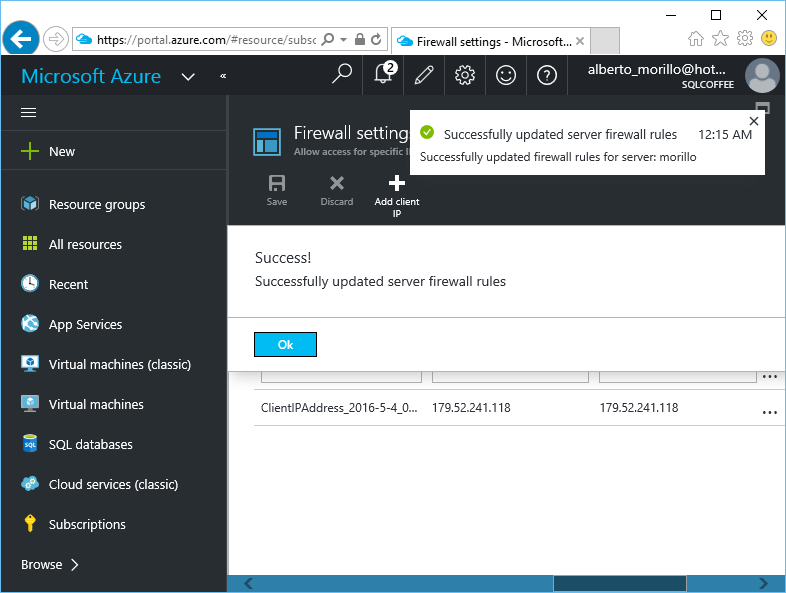
You can click on the "+ Add client IP" button to create a rule on the Firewall
that will add the public IP of your actual computer to the list of IP addresses
allowed to access the SQL Azure server. You can also use the "Start IP" and "End
IP" fields to allow access to a range of IP addresses.
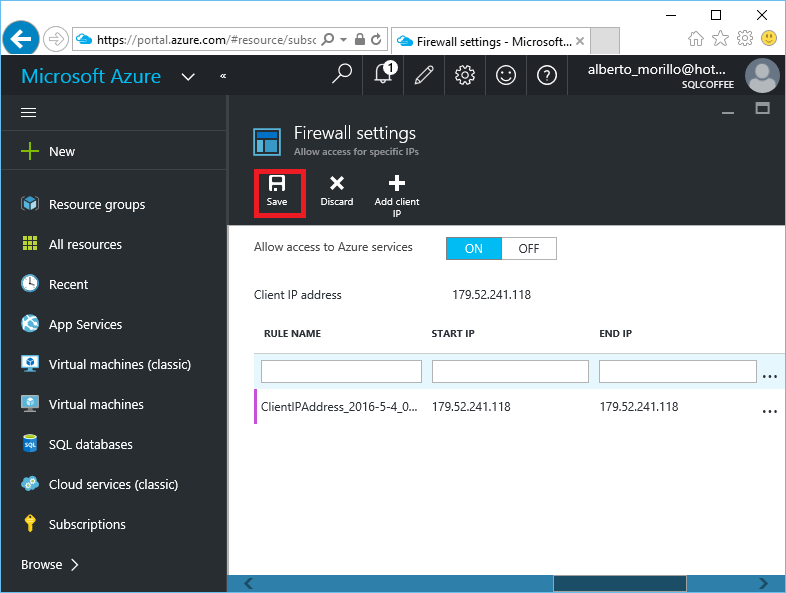
Click on the icon shown below to save the firewall rules you have just created.
|
![[Company Logo Image]](images/SQLCofee.jpg)
