Migrating SQL Server databases to Azure using SSMS 2012
Applies to: Microsoft SQL Server 2012 Enterprise Edition.
If you are planning the migration of SQL Server databases to Windows Azure, SQL
Server 2012 Management Studio (SSMS) provides you a great wizard to perform this
task in just a few minutes. Below you will find the procedure to this migration.
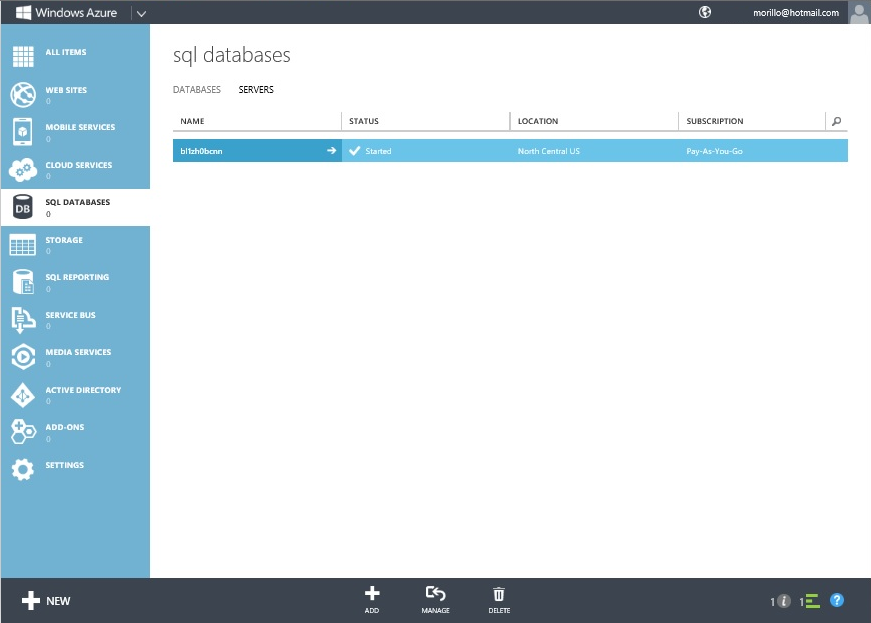
1. Create a database server on Windows Azure.
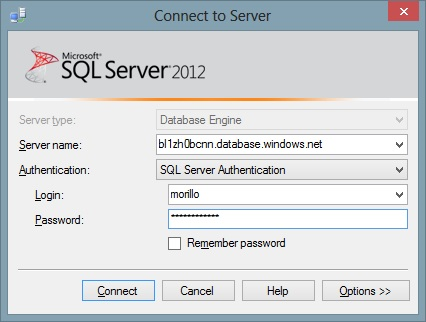
2. Connect to the Windows Azure database server as shown below.
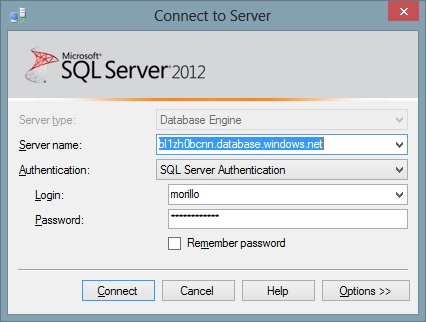
3. Connect to the SQL Server instance located on your LAN or local computer.

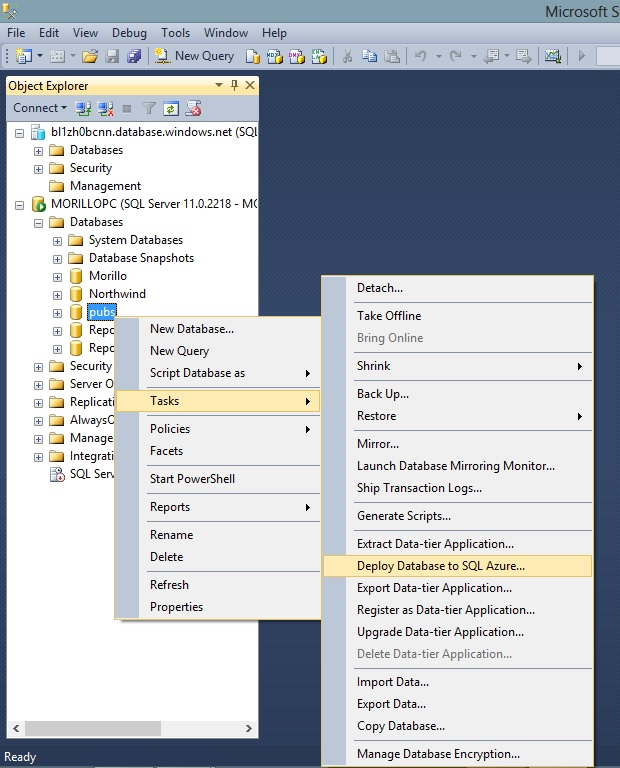
4. Make a right click on a database on your SQL Server instance that you would
like to migrate to Windows Azure. Make a click on “Tasks” then select “Deploy
database to SQL Azure…” For this procedure we are using an old SQL Server 2000
database named Pubs that we previously upgraded to SQL Server 2012.
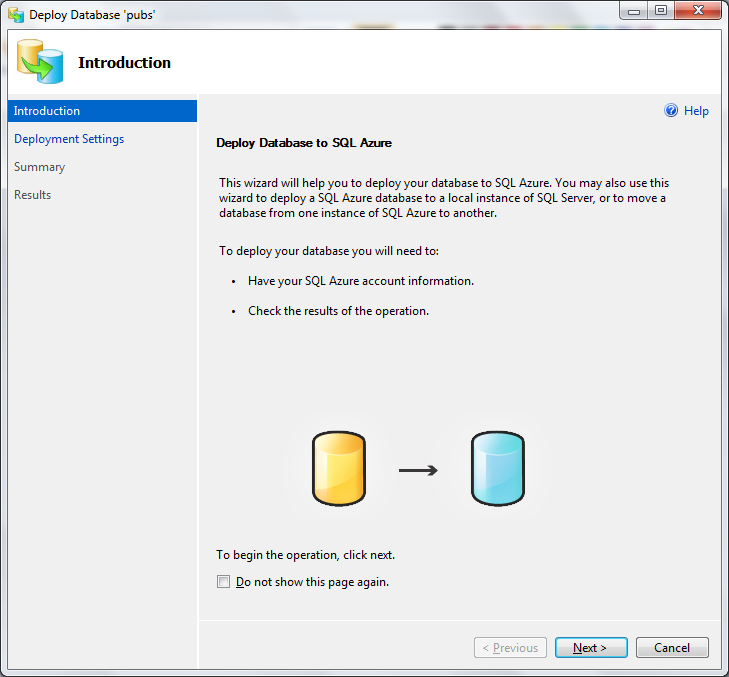
5. Click on the Next button on the Introduction dialog of the wizard.
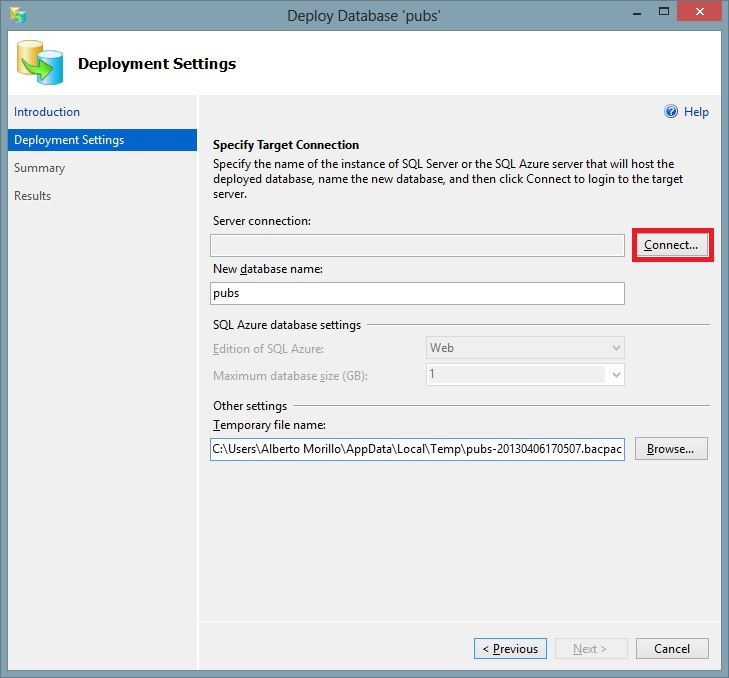
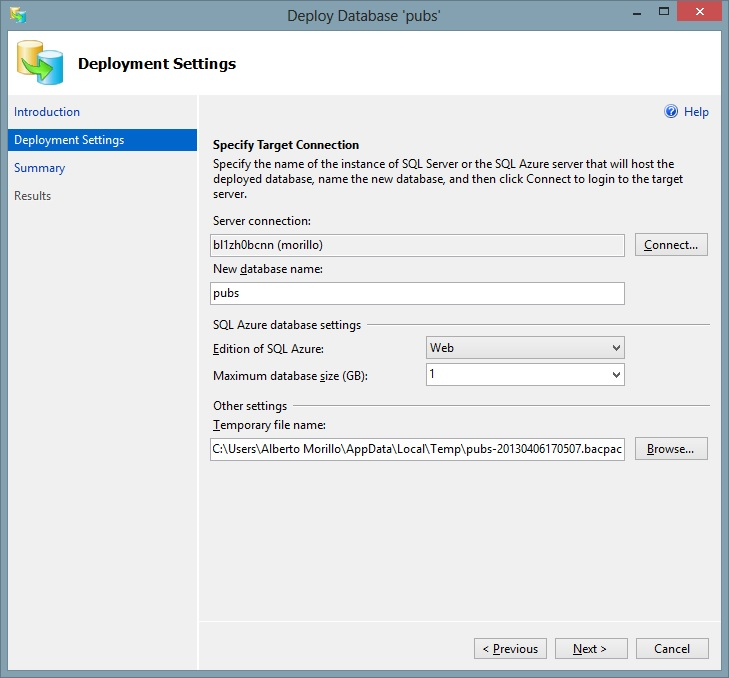
6. On the Deployment Settings dialog of the Wizard, click on the Connect button
to provide credentials and get connected to the SQL Azure database server. Once
the connection has been established, click on the Next button.
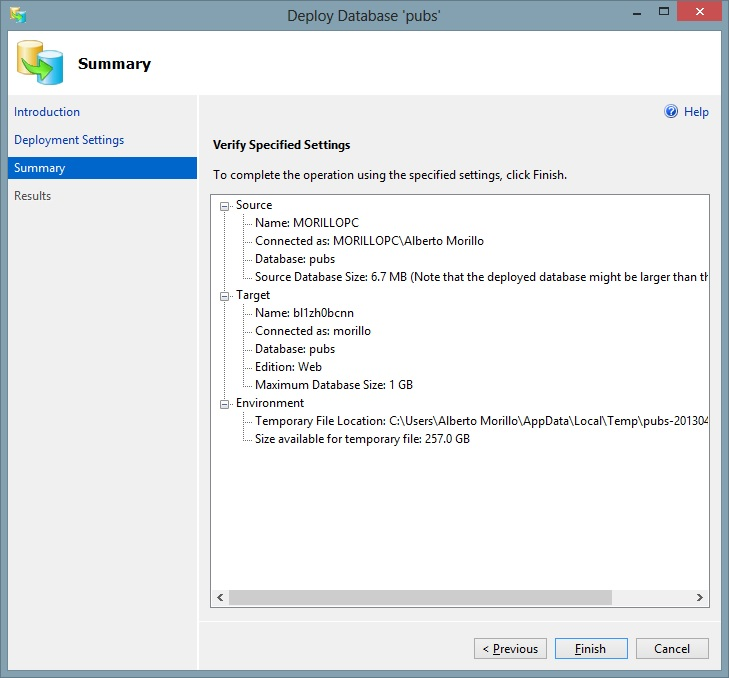
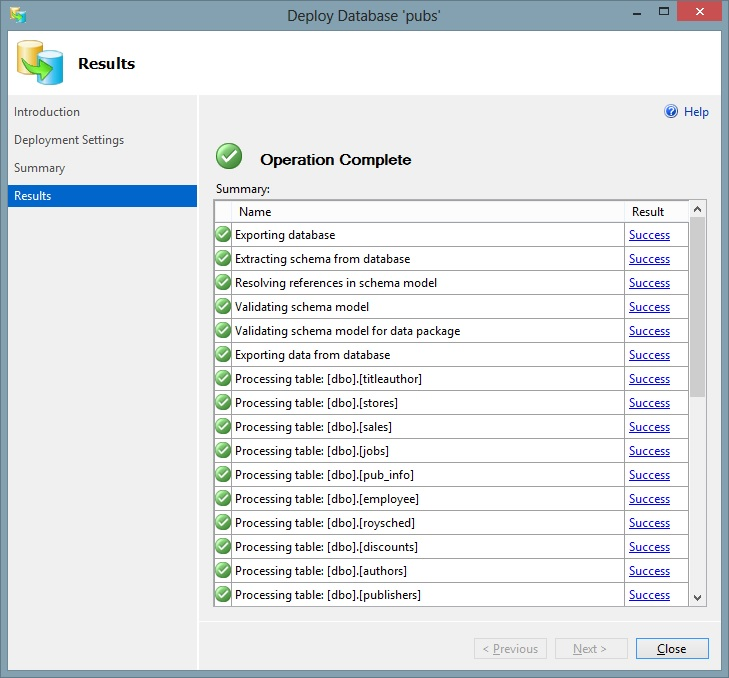
7. A summary of all the options you have chosen will appear on the Summary
screen. Make a click on the Finish button.
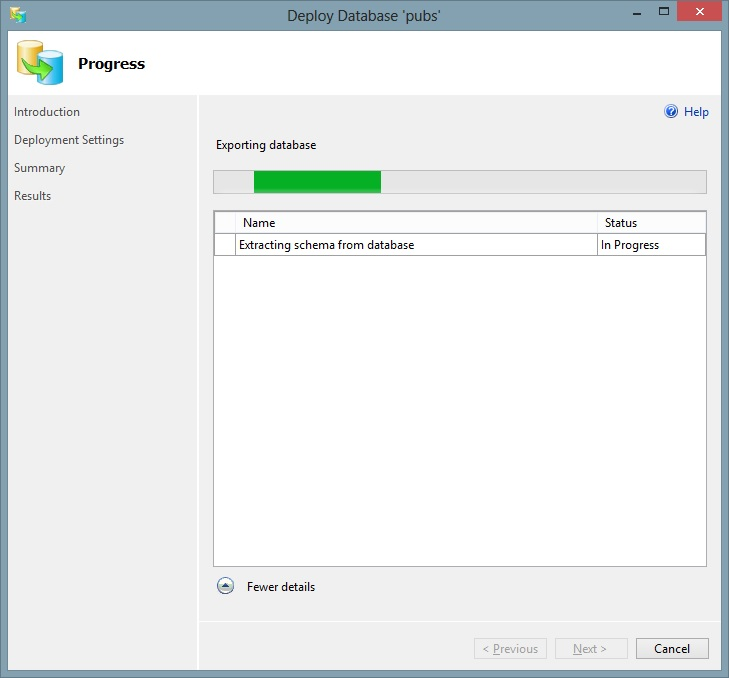
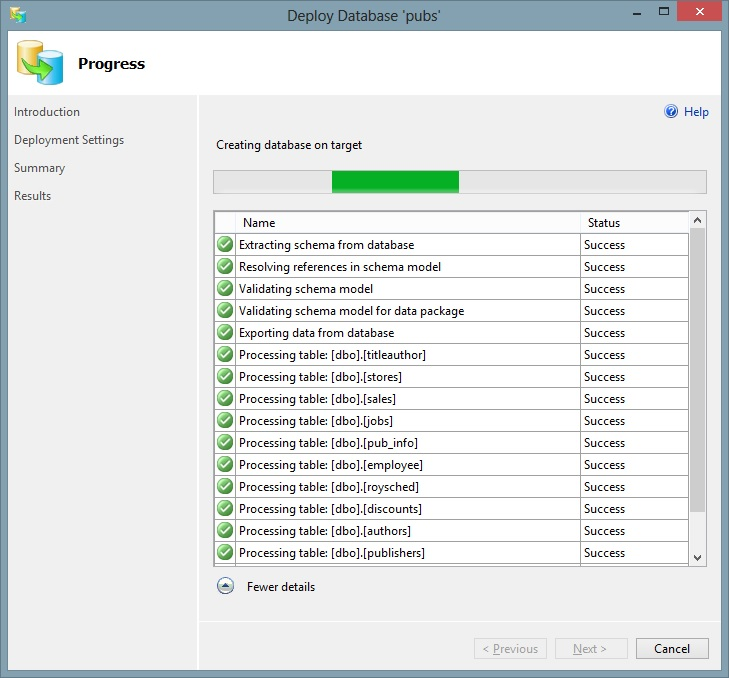
On the process of exporting the database to the SQL Azure server, we received
the following error:
One or more unsupported elements were found in the schema used as part of a data
package.
Error SQL71564: Table Table: [dbo].[roysched] does not have a clustered index.
SQL Azure does not allow the creation of tables that don’t have a clustered
index. We created clustered indexes on an identity column we added to each
table. We then re-run the Wizard again and the migration process finished
successfully.
We ran a simple SELECT statement on the database we just migrated to the Windows
Azure database server using SSMS.
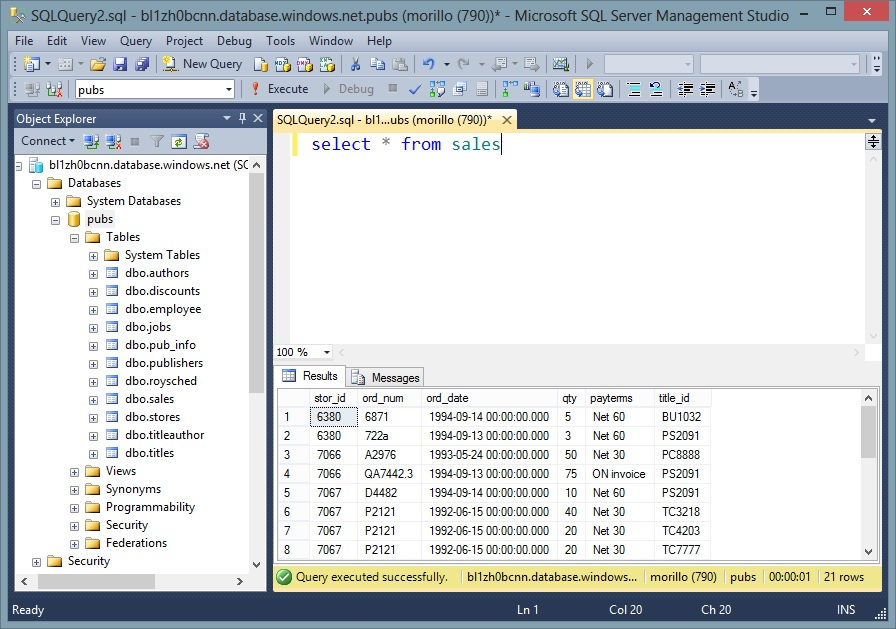
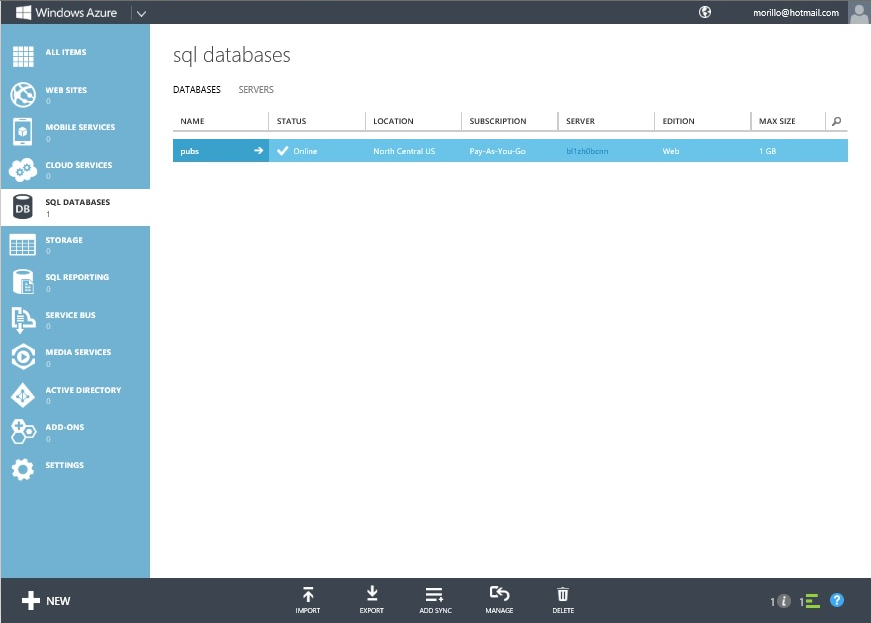
Let’s confirm the Pubs database now exists on the Windows Azure database server.
![[Company Logo Image]](images/SQLCofee.jpg)
