[Company Logo Image] 

Home Up Contents Coffee Break Credits Glossary Links Search

 
How to install SQL Server 2012 Express Edition


Home
Analysis Services
Azure
CLR Integration
High Availability
Open Source
Security
SQL Server 2008
SQL Server 2012
SQL Server 2014
SQL Server 2016
SQL Server 2017
SQL Server 2019
Tips
Troubleshooting
Tuning

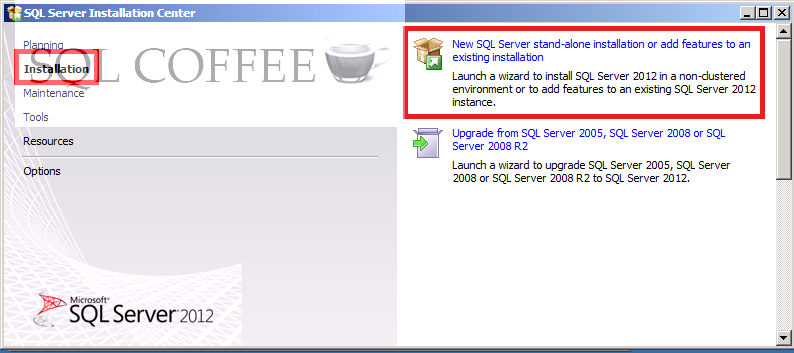
How to install SQL Server 2012 Express Edition.


Applies to: SQL Server 2012 Express Edition with Tools, Windows Server 2008 R2.


This article will guide you on how to perform a new SQL Server 2012 Express Edition with Tools. To download SQL Server 2012 Express with Tools, please click here and then click on the "Download" button (red button), Now click on the checkbox to the left of ENU\x64\SQLEXPRWT_x64_ENU.exe (if you would like to download the 64-bit version) or  ENU\x86\SQLEXPRWT_x86_ENU.exe (if you would like to download the 32-bit version), then click on the "Next" button and the download will start inmediately.


The following are some recommendations before installing SQL Server 2012:

bulletDownload and install .NET Framework 4.0. If the computer has Internet access, SQL Server setup will download it when needed.
bulletEnable .NET Framework 3.5 using Control Panel -> Programs and Features -> Turn on/off features.


Operating Systems Requirements.

bulletPlan to install on a NTFS file system.
bulletDo no try to install SQL Server 2012 on a compressed, encrypted or read-only drive, because setup will block the installation.
bulletDo not install SQL Server on a Domain Controller. Click here for more information.
bulletVerify Windows Management Instrumentation service (Control Panel -> Administrative Tools -> Services) is running.
bulletConfigure your firewall to allow SQL Server access. Click here for more information about protocols and port numbers.
bulletThe user account that is running SQL Server Setup must have administrative privileges on the computer.
bulletSP1 for Windows Server 2008 R2, SP2 for SQL Server 2008, SP1 for Windows 7 and SP2 for Windows Vista are required. Windows XP, Windows Server 2003 and Windows Server 2000 are not supported.
bulletApproximately 2.5 GB of disk space are required by SQL Server setup. 1591 MB are required on the system drive and 865 MB on the drive where the instance directory will be located.


Step-by-step procedure to install SQL Server 2012.


Run SQL Server 2008 R2 setup.


On the SQL Server Installation Center, make a click on the "Installation" hyperlink in the left side of the screen.


This screen shows the types of installation available.  Let's select the first type available "New SQL Server stand-alone installation or add features to an existing installation".


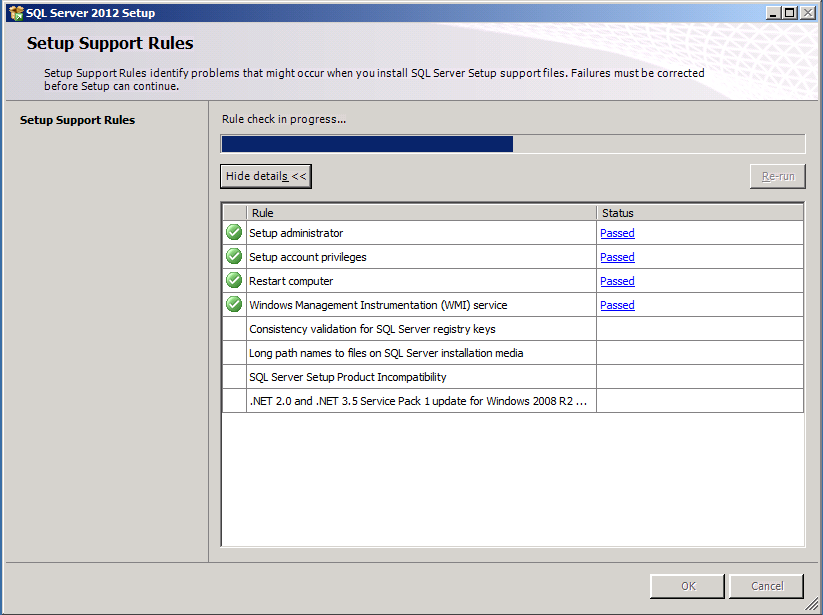
Above you will find the first set of Setup Support Rules. The Next button is available only if all check results are successful, or if failed checks do not block installation. SQL Server may take you automatically to next page if no rules fail.


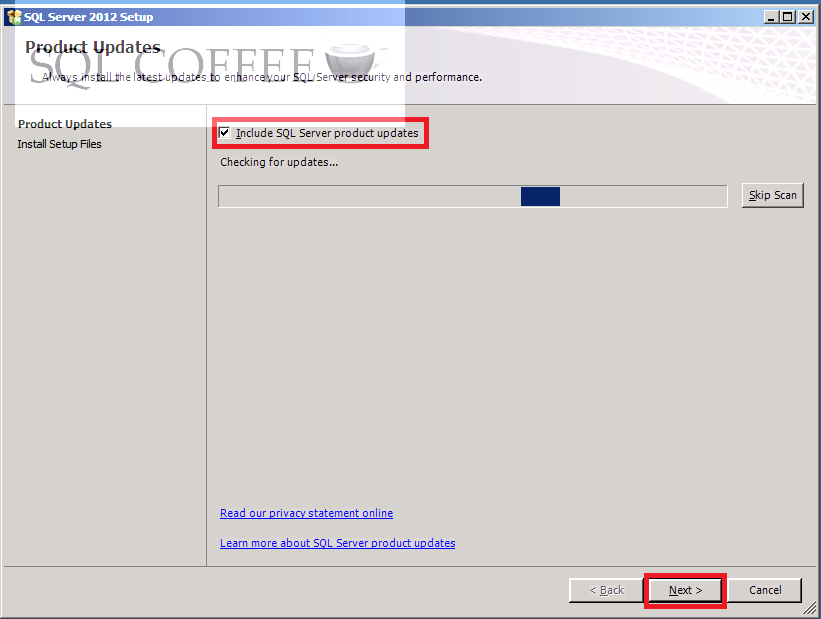
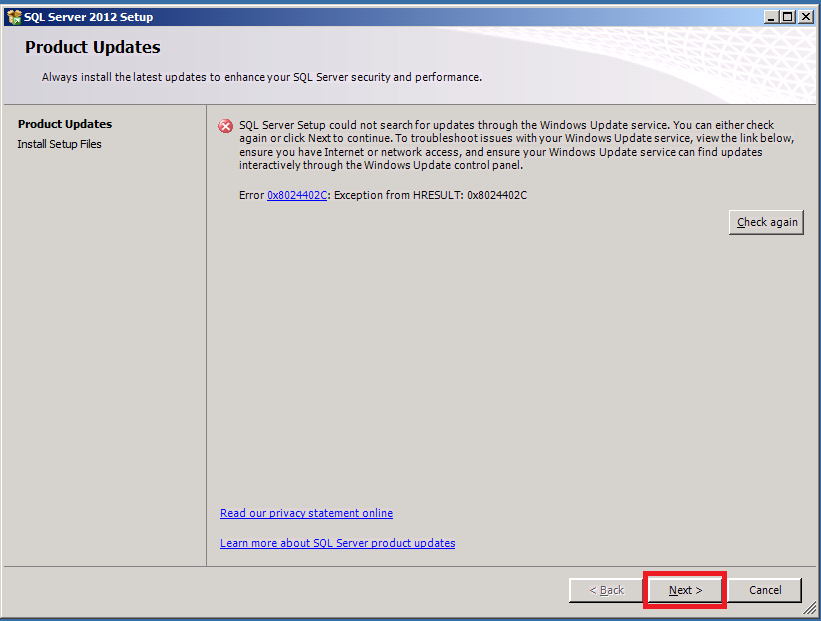
Access to the Internet is required, since SQL Server setup will try to get updates for SQL Server during installation. If the computer does not have access to the Internet and Windows Update service, uncheck the checkbox or, you may get the above error message:

"SQL Server Setup could not search for updates through the Windows Update service. You can either check again or click Next to continue. To troubleshoot issues with your Windows Update service, view the link below ensure you have Internet or network access, and ensure your Windows Update service can find updates interactively through the Windows Update control panel

Error 0x80240042: Exception from HRESULT: 0x80240042."


On the following page, setup files will be installed.


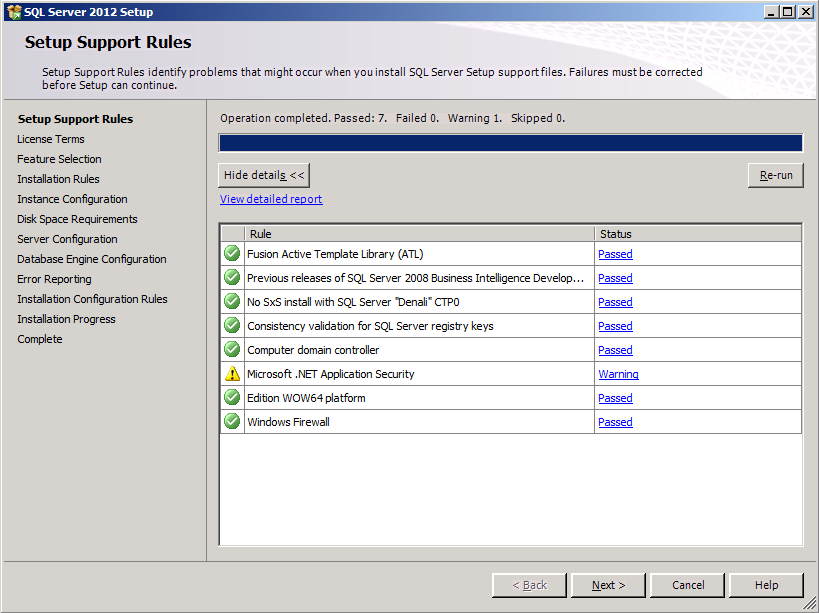
The above screens belong to the second set of Setup Support Rules.

About the Windows Firewall warning, you can go ahead with the installation of SQL Server, but when it finishes configure your Windows Firewall to allow SQL Server access or disable it. Click here to know how to configure Windows Firewall for SQL Server access. After configuring Windows Firewall, the Windows Firewall warning will disappear if you click on the "Re-run" button.

About the Microsoft .NET Application Security warning, Setup Support Rules verifies Internet connectivity and triggers a warning if there is no Internet connection. The reason to check for Internet connection is "because .NET always tries to connect to CRL.MICROSOFT.COM on startup to check signature validation.". For more information click here.

Neither of these warnings will prevent you from installing SQL Server.


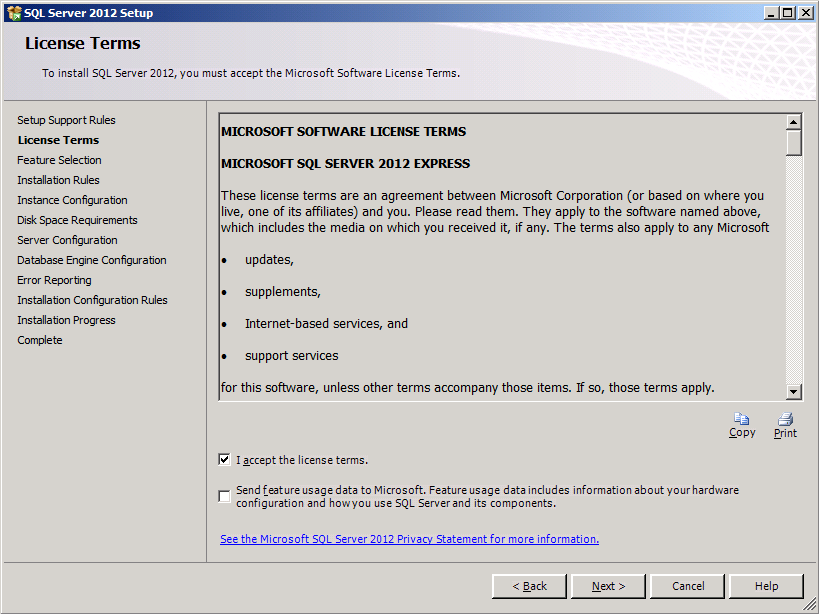
The above is the License Terms page.  Read the license agreement and if you agree with it, check the "I accept the license terms" check box, and then click the Next button.


On the Feature Selection page, please select the features you would like to install. A description of each feature will appear on the "Feature description" area when you click on a feature.


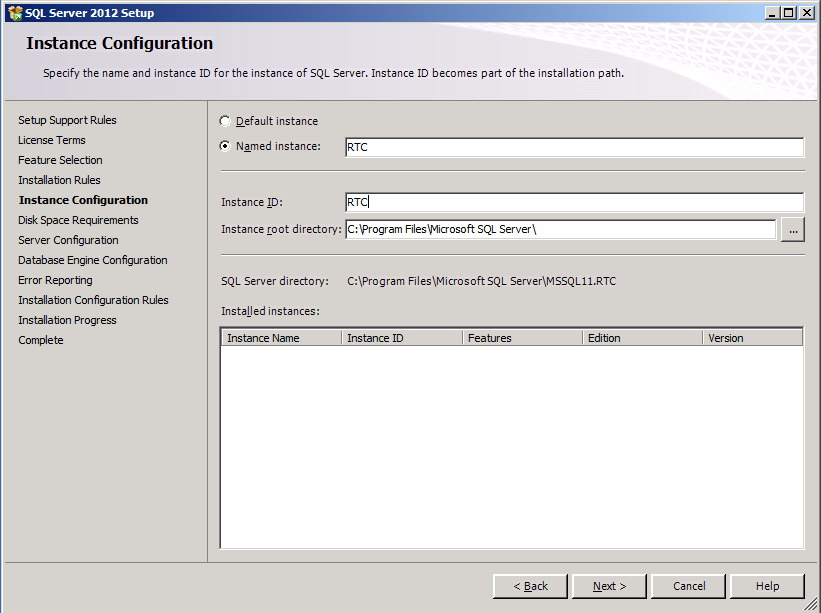
On the Instance Configuration page, choose a name for the instance or select a default instance. A default instance has the computer name as the name of the instance. On the above image, RTC is the name of the instance.


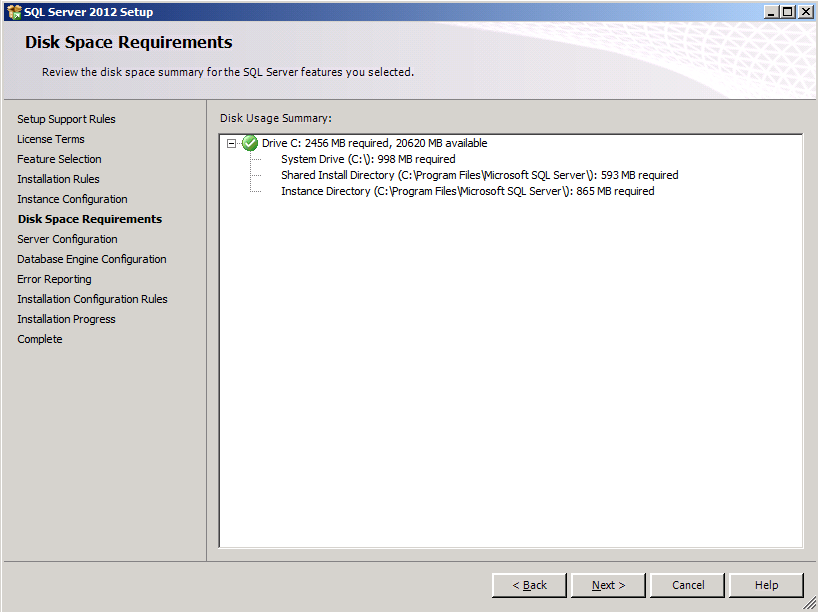
This Disk Space Requirements page is just for the purpose of reviewing disk usage.  Click on the "Next" button to continue setup.


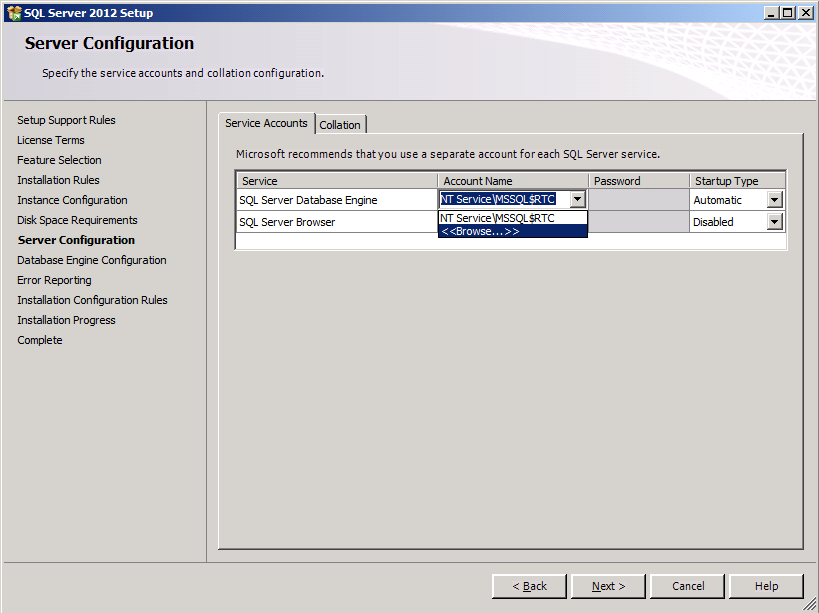
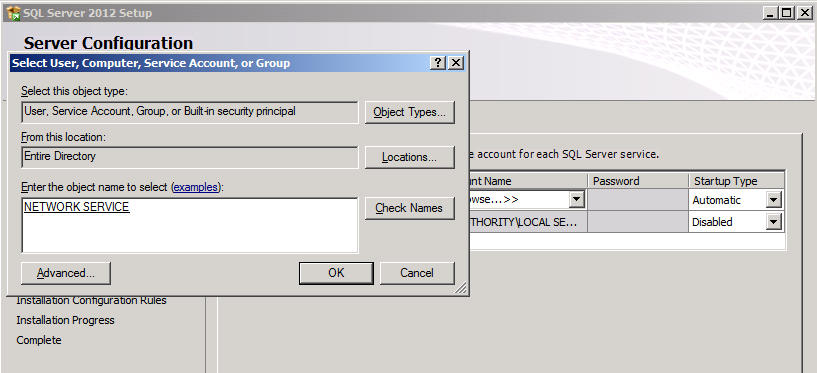
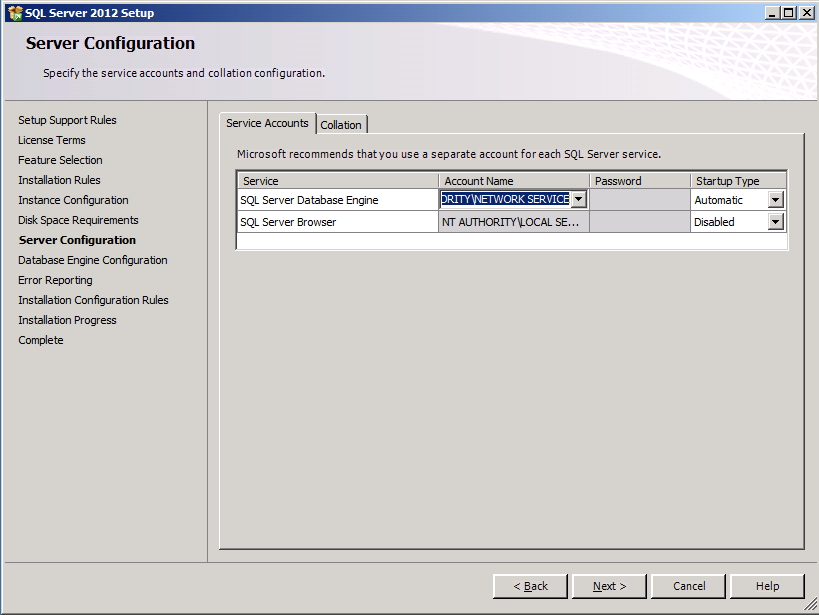
SQL Server offers a virtual account as default SQL Server service account. A virtual is a "managed local account that provide the following features to simplify service administration. The virtual account is auto-managed, and the virtual account can access the network in a domain environment. If the default value is used for the service accounts during SQL Server setup on Windows Server 2008 R2 or Windows 7, a virtual account using the instance name as the service name is used, in the format NT SERVICE\<SERVICENAME>". For more information, click here.

Alternatively, you can create a local user or use a domain user account to start SQLServer services.

If the computer is not part of a domain, you use a local user account without Windows administrator permissions too. You can create this account using Control Panel -> User Accounts.

Use a Domain User Account if the service must interact with network services or access domain resources. This account should be pre-created by a domain administration in your environment.

Whether you create a local user or a domain user account, the password you use to create the account must be a strong password.

You can also use built-in accounts (the Network Service account, Local Service, Local System) as service accounts. However, I would not recommend to use Local Service Account for SQL Server (MSSQLSERVER). Use Local System if you need a very high-privileged account. It has extensive privileges on the local system.

Microsoft recommends you to specify an individual account for each service. The service accounts used for this configuration must have a strong password as mentioned above, otherwise you will get the error "Invalid or missing username or password. To continue, provide valid credentials for the SQL Server Agent service".  A strong password  is one that has a combination of letters in uppercase, lowercase, numbers and special characters.


For this installation we choose a built-in account, but the default virtual account should work if you cannot decide what service account use.


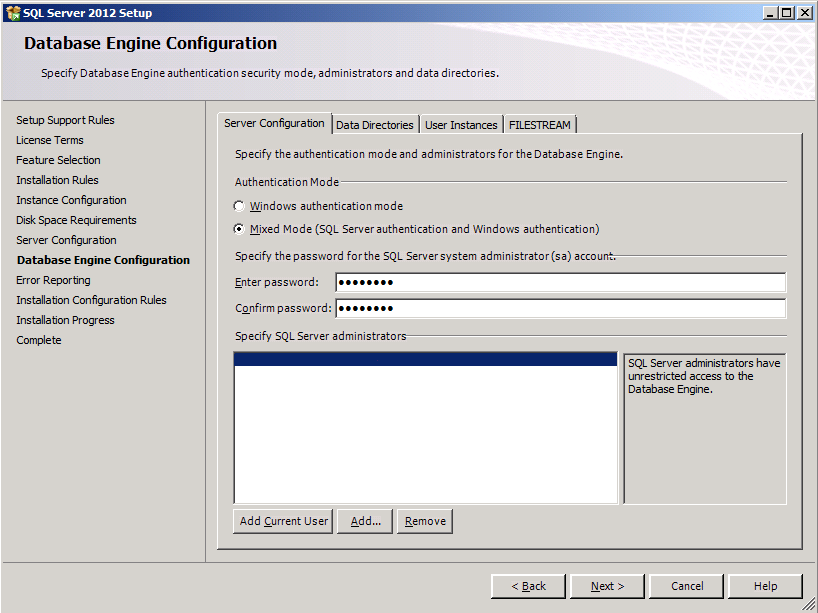
On the Database Engine Configuration page, choose the authentication mode to use for your SQL Server installation. Use a strong password for the sa account if you choose mixed authentication.

Click on the "Add Current User" button to add you Windows Account as SQL Server Administrator or click on the "Add" button to add more local Windows accounts or Domain accounts. This is recommended if you choose Windows Authentication mode.


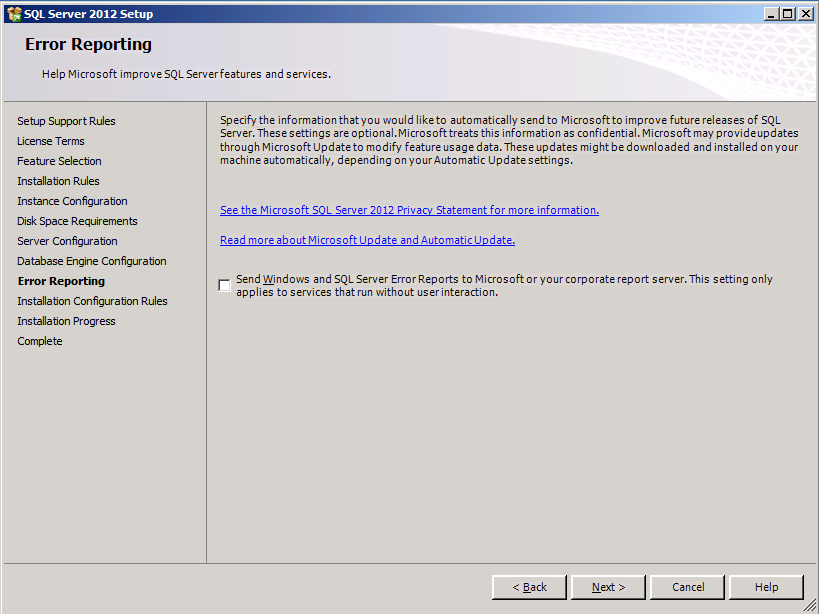
On the Error Reporting page, optionally clear the check box to disable error reporting.


The installation will start automatically if the Installation Configuration Rules don't fail. Setup will be running these rules to determine if the installation process will be blocked.


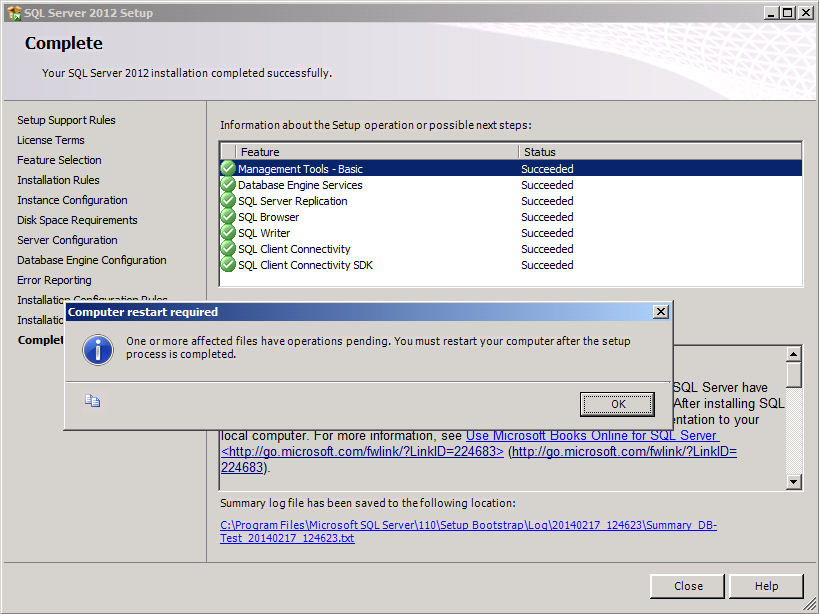
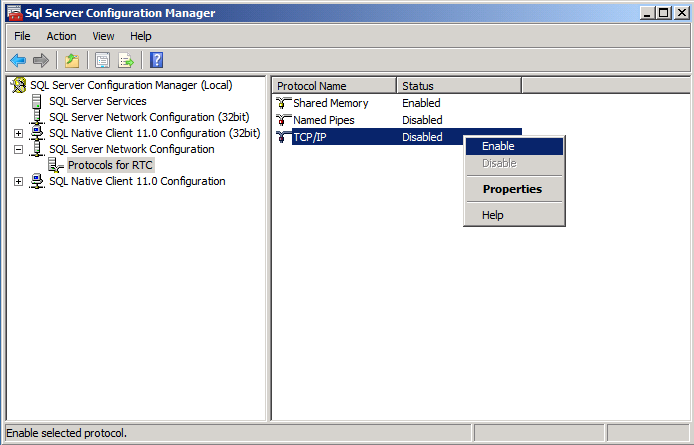
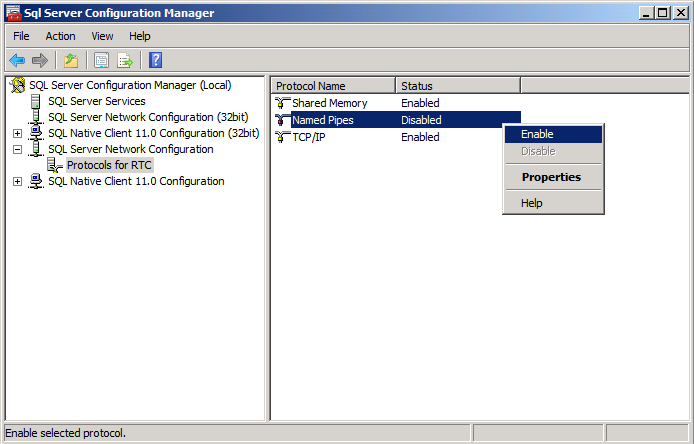
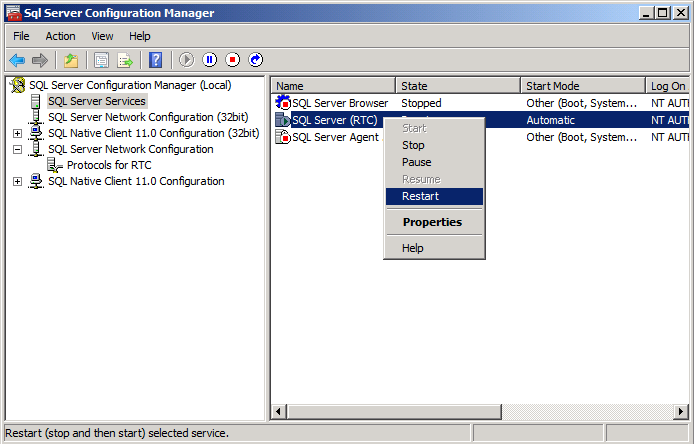
This installation completed successfully. Click OK and then click in the Close button.

Now let's enable protocols. Enable all three protocols. Click here to know how or see the following images:

Open SQL Server Configuration Manager, click on SQL Server Network Configuration on the left panel, then right click on each protocol and click on Enable.


Do not forget to restart SQL Server service after enabling a new protocol. Click on SQL Server Services on the left panel, then make a right click on the SQL Server service and restart the service.


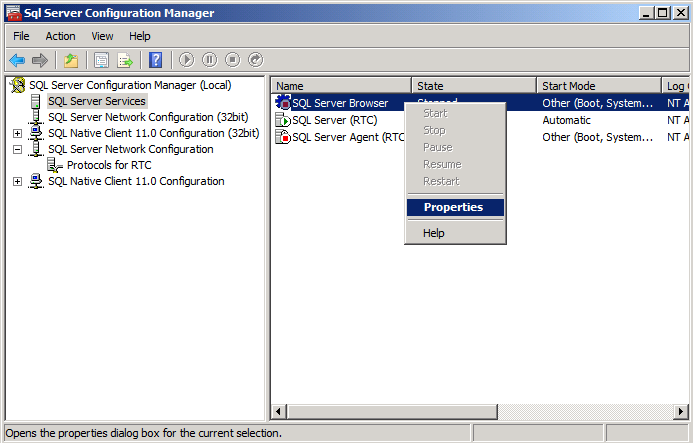
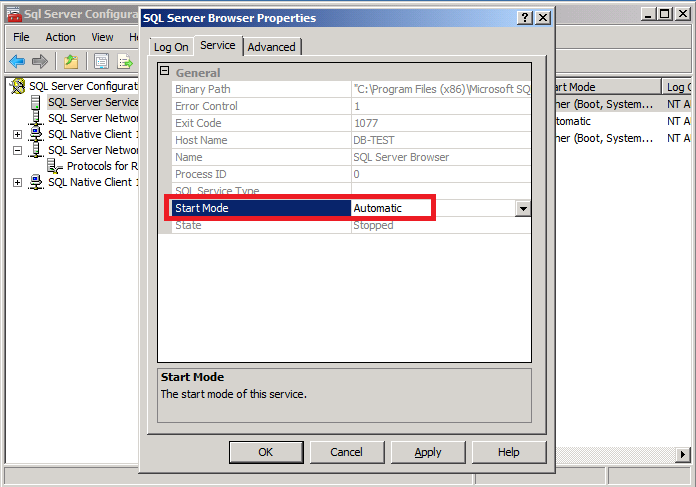
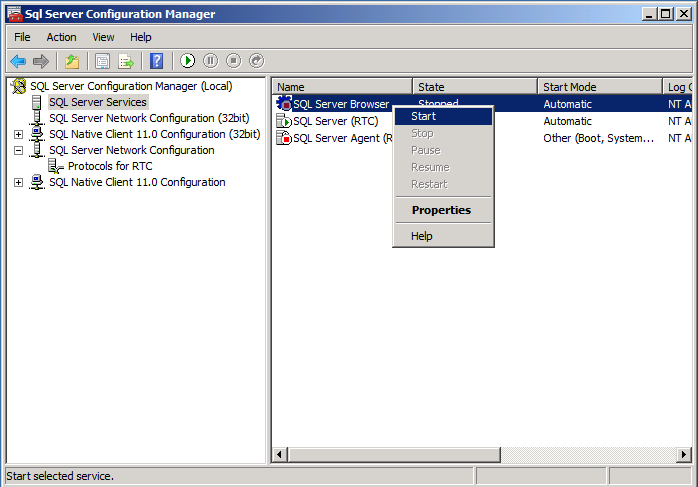
Please enable SQL Server Browser service if you installed a named instance of SQL Server.


Now you can get connected to the instance using computername\nameoftheinstance or (local)\nameoftheinstance as the "Server Name" if you open SQL Server Management Studio to get connected to the instance. The default instance name is computername\SQLEXPRESS or (local)\SQLEXPRESS when SQL Server Express is installed, and not instance name was specified on the Instance Configuration page.

You are now ready to use SQL Server 2012. Enjoy it!


.Send mail to webmaster@sqlcoffee.com with questions or comments about this web site.